


Bamboo is a very common warm-up. My instructor says, if you're calm and relaxed, paint flowers; if you're stressed out, paint bamboo. And like everything, you could spend a lifetime perfecting it.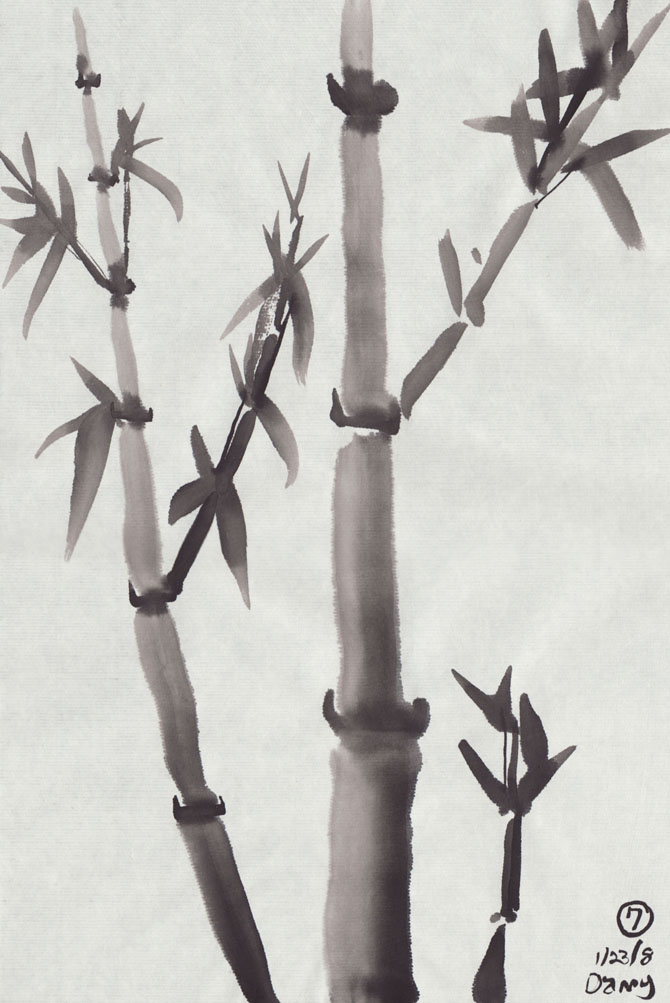
That's my best so far. It's not terrible, but it's not beautiful either. My instructor paints like poetry in motion. Every leaf is breath-taking. I'll ask if I can post the example she made in class.
Until then, here's a link to her gallery (no bamboo I'm afraid):
http://www.brushpaintingcircle.com/art/artworkone.html
Okay, moving on: I'm sharing what little I've been able to grasp, but DON'T copy me. You'd be dooming yourself to mediocrity. Instead, go find some photo reference and try to paint what you see and throw in these techniques to help get the ball rolling.
Step 1: The Trunk
--load a hard bristle brush with the three tones of gray to make a gradient.
--hold the brush at a 15 degree angle and make a stroke upward. Remember to have a start and end point so you get a bone shape.
--there is a small space between sections.
--as you make the sections of the trunk, lessen the tilt on the brush so the trunk sections get thinner.
--remember the trunk sections are straight, so if the stalk of bamboo curves at all, it's usually at the joints and it's usually very subtle.
--after making the sections of the trunk, come back with black and make a connecting line through the joints. Again it's bone shaped and the points on either end tend to flick upward.
Step 2: Branches
--branches are just like the trunk technique.
--keep in mind, branches only shoot out from the main trunk at knots between sections.
--keep in mind branches have the same basic direction as the trunk (upward). So don't make them shoot out at a 90 degree angle, make them 45 or 30 degrees upward.
--don't forget to add a line thought the knots of the branch sections (or two dabs when the branch gets thinner.
--as the branches get to be extremely thin, the last section can be a pointing stroke.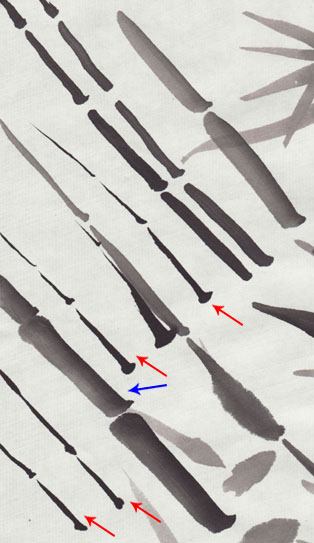
Here's some branch practice I did. Note: the pointing technique should only be used for the LAST section of a thin branch. Mine are WRONG (red arrows). See how I used pointing stroke after pointing stroke and they don't seem to hold together as one branch, verses the thicker branch (blue arrow) which have a thicker start and end point between the sections... those endpoints and the bone shape are key.
Also note, these branches don't have the line and dabs at the joints, so don't forget about those.
Step 3: Leaves
--The technique is simple, but takes much practice to master.
--we're going to be varying pressure, so you should use a *hard bristle brush* (you will find it pretty hard to do with a soft bristle brush)
--use black ink or a little dark gray + black ink.
--hold the brush at LESS THAN 90 degree angle in relation to the page. (it's tempting to do center brush, but you get better results if you tilt a little in the direction you plan on travel with your motion)
--it will be one stroke that has a nice almond shape.
--when we make the stroke, the motion is in a straight line, starting with the base and ending with the tip of the leaf.
--the pressure gives us a thicker base and then we fade away to the tip.
--remember to re-shape your brush tip before each stroke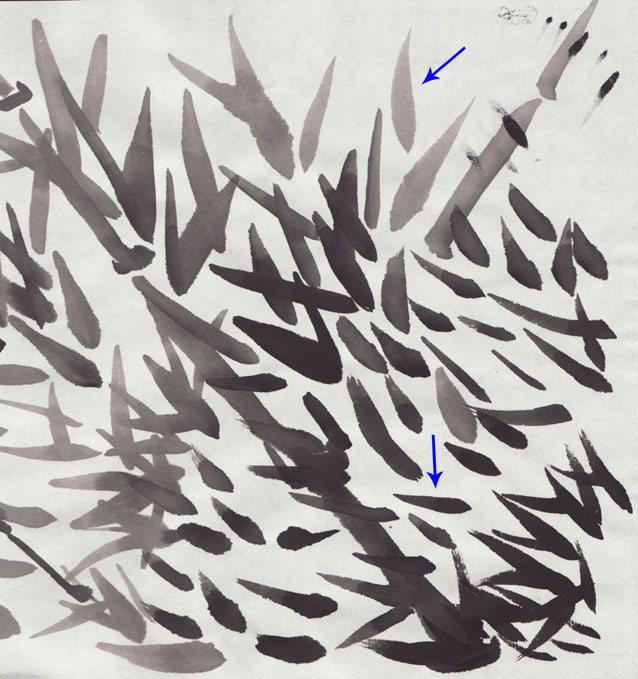
Here is just a little of the many, many leaves I did. I've made blue arrows to the only two that are even close to correct. However, as always, let's identify the mistakes.
Near the bottom middle, we see a lot of fuzzy fat leaves, my brush was too wet.
Near the bottom right, we see leaves that have mult-pronged tips. At first this might look like my brush was dry, but it turned out, I forgot to reshape the tip of my brush (so the tip was not perfect before I started, and only got worse with each leaf).
Characteristics of a Bamboo Leaf
--long and smooth. My biggest problem was that I kept making leaves that were too short, and as soon as they are too short, they also tend to look too fat.
--the leaves are usually found in bunches of three, but don't make them look like chicken feet. Vary their size, direction, length, and starting points.
--There are two types of bamboo leaves, young and old.
----Younger leaves are thinner and tend to point up (or in the direction of the branch they came from). They also appear near the end of the branch (last/thinnest sections)
----Older leaves are bigger and wider and tend to hang down. The appear close to where the branch breaks away from the trunk.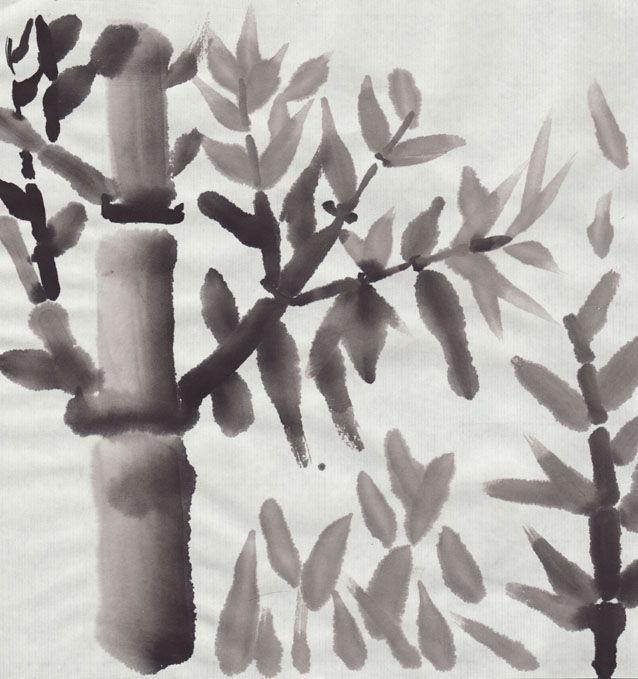
in this example, everything is just too wet. Everything blurred all over the place. On top of that, my leaves are so perfectly symmetric along the branch that they just look fake. And in some places the leaves actually shoot out at 90 degree angles, which looks even less natural.
Also, because my leaves are mostly not long enough, they appear fat and stubby.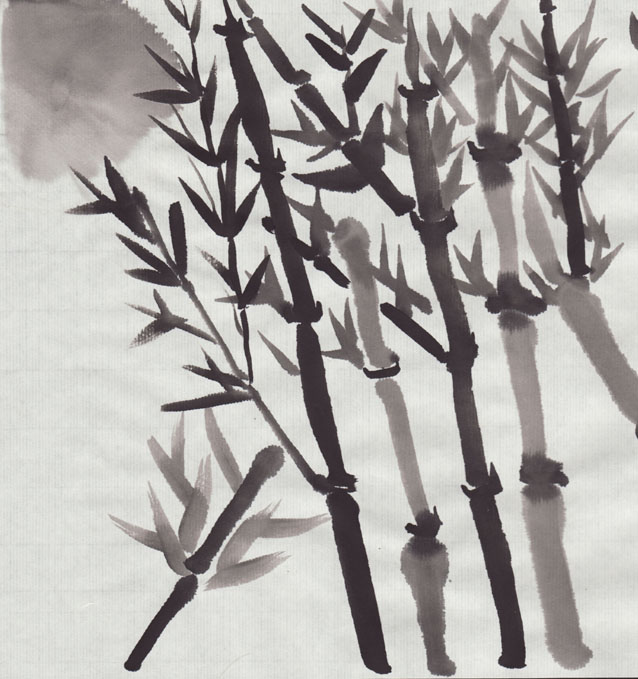
in this example, all my leaves point up (no 90 degree angles). I varied their size some, but not their direction, so they all look like young leaves, which looks out of place and wrong.
Also note: on the bottom left, again I forgot to reshape my brush tip, and my leaf tips are not a single point as a result. However, in that same spot, we can see how varying the starting point can look more interesting and less like a 3 toed chicken foot.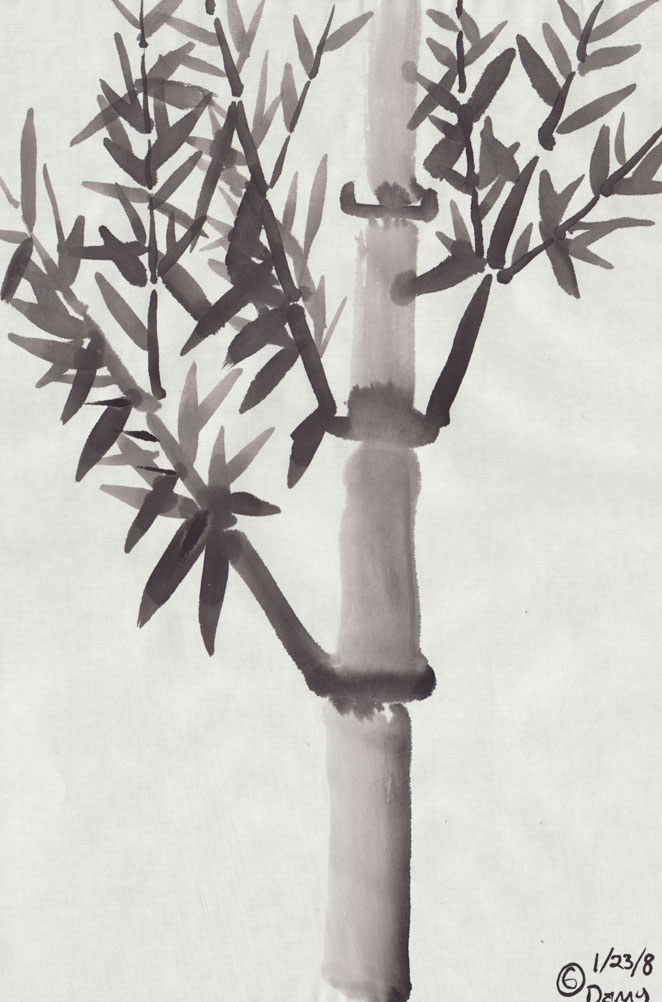
This one remind me of a fern instead of bamboo. There are just so many leaves of such a uniform size on each branch that it looks like a different type of plant.
However, there are a few older looking leaves on the bottom left branch that are not a bad variation (if only I had used them more).
Step 4: Stem Detail
--if you varied the placement of your leaves well, they should appear to be growing out of thin air in places. Use a detail brush to draw very thin lines from a knot on the branch to the base of the floating leaves to get them connected correctly. This detail add so much.
Step Zero: Composition
Composition is a whole subject unto itself, so let's not get too deep into that. Basically, we're just looking for a nice balanced final painting. And the only way to do that is to plan ahead (which is why I called it "step zero.")
Scroll up a little and look at the previous example (with the 6 in the bottom corner of the paper.) Doesn't it look out of place? It's just a bamboo trunk shooting straight up out of nowhere. Then there are lots of branches and leaves on the left side, and not so much on the right side. It feels unnatural and out of place.
A common layout is to have a bigger bamboo trunk a little off center, then a smaller one off to the side and a very small one on the other side.
I'll leave you with this last example. Again, it's not the best, but it shows progress and I'm sure you can appreciate what went into it much more now here at the end, compared to when you first saw it at the beginning of this post.
Monday, January 28, 2008
Chinese Brush: Make Bamboo


 Labels:
ChineseBrush,
Technique
Labels:
ChineseBrush,
Technique
Subscribe to:
Post Comments (Atom)


No comments:
Post a Comment